![]() Accessible by the shortcut key 'V' on your keyboard the
Move Tool is a very versatile tool. As
its name suggests it is primarily moved for moving images on your canvas, but
it is also used for many other manual mouse dragging functions such as:
Accessible by the shortcut key 'V' on your keyboard the
Move Tool is a very versatile tool. As
its name suggests it is primarily moved for moving images on your canvas, but
it is also used for many other manual mouse dragging functions such as:
- Resizing one or more layers
- Transforming
- Scaling
- Rotating
- Skewing
- Distorting
- Warping
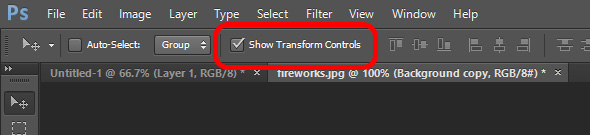
To be able to access these functions though we
need to make sure the transform controls are visible. The easiest way to do this is to select the
Move Tool by either clicking on its icon in the Toolbar or pressing V on your
keyboard. At the top of the screen you
can see the option to 'Show Transform Controls'. Tick the box to show the controls around the
image.
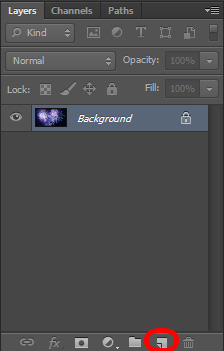
The Transform Controls will only show up on a layer that is not the background layer. the background layer of an image is locked. If you need to manipulate a background layer then you need to make a duplicate of the layer. The easiest ways to do this are to either click on the background layer and drag it down to the 'Create a new layer' icon as below, or just press Ctrl+J on your keyboard.
With the new layer created your layers selections will look something like this:
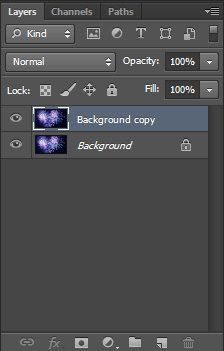
The Background copy layer is now free to be manipulated. To better see what you are doing click on the eye to the left of the background layer to hide it.
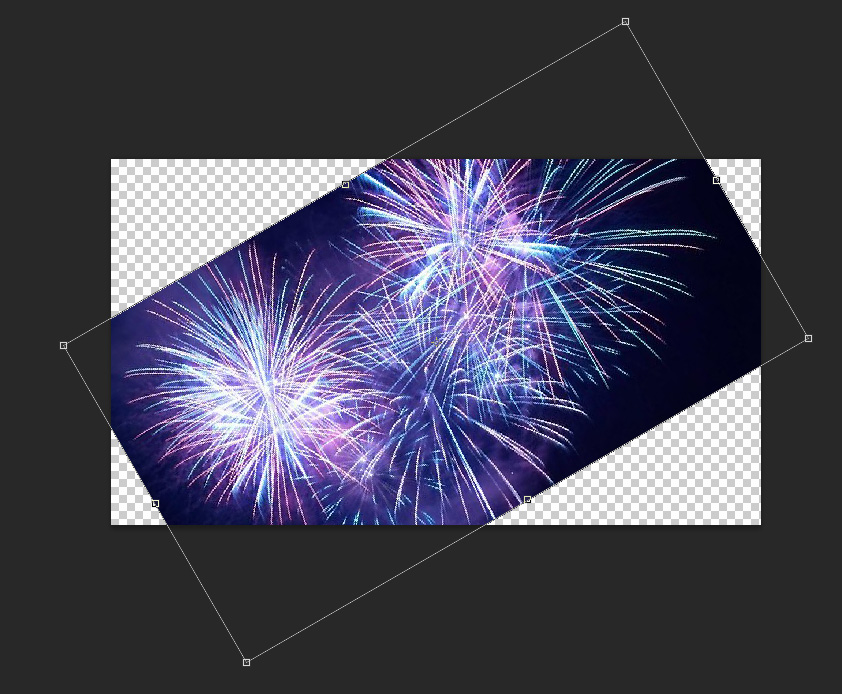
Once your copy layer is ready click on the Move Tool and select 'Show Transform Controls'. You will see the bounding box around the image plus eight little squares around the outside. These are your controls:

Try grabbing any of these controls and move your mouse around and you will see the image resizing, although not staying in proportion. It will resize within the confines of your canvas size, so if you make it much larger than the canvas you will only see part of the enlarged image. Once you click on one of these controls you will see the lines of the box around the edge become slightly bolder. This indicates you are in the process of controlling the image.,
To resize while keeping the image proportion, hold down the Shift key on your keyboard while scaling.
Once you are happy with the size/scale and proportion of your image press the Enter key on your keyboard to accept the changes to the image. The bounding box lines will go back to thin. If you are unhappy with the changes you can always go back to how it was by choosing Edit in the top menu and choosing Undo Freeform Transform, or pressing Ctrl+Z on your keyboard.
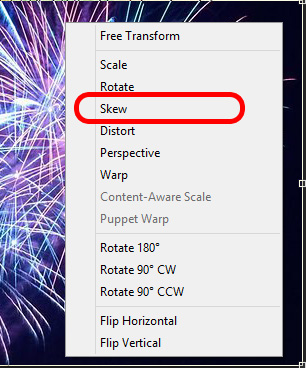
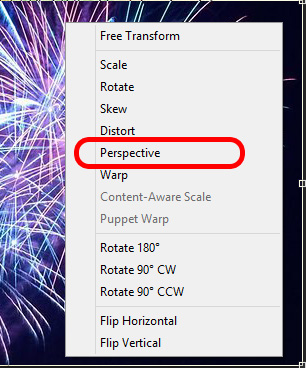
To access the other transforming options for the image the simplest method is to simply click on one of the controls. You will see that the outline once again becomes thick. Now anywhere in the image itself just right click and you will see a list of options:
We've already looked at Scale (Resize) so next we have Rotate.
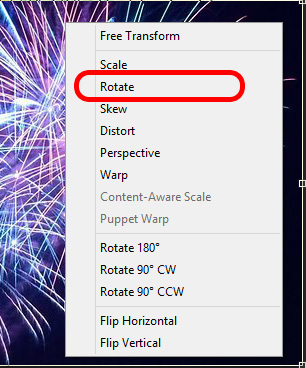
As its name suggests, Rotate allows you to turn your image around. As you approach any of the controls after choosing Rotate, your cursor will change into a rotate icon (a curved line with pointers on each end). Choose which ever control you want and move your mouse. You will see the image turn clockwise or counter-clockwise, whichever way you have chosen. For more control over the angle of the turn, press the Shift key on your keyboard to see it move in 15 degree increments. As with scaling, once you are happy with the angle, press the Enter key to accept the changes.
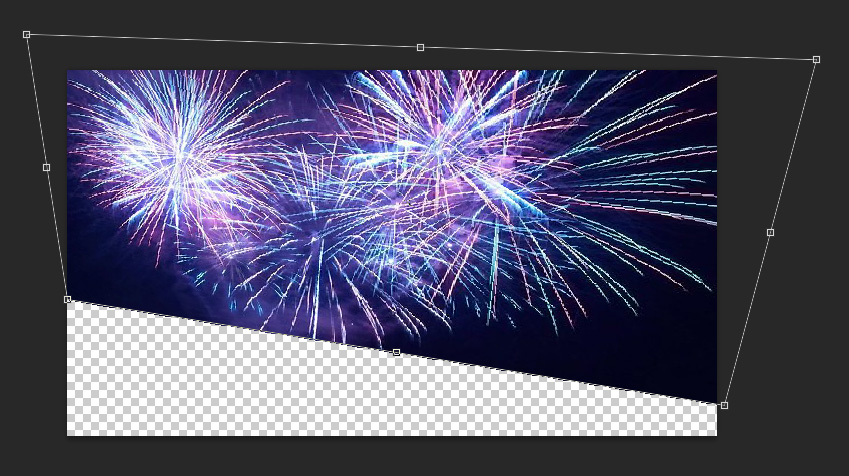
Next on the list is Skew:
The Skew option is a limited form of distortion. You can only manipulate the controls on the corner of the image and stretch them to skew the image as below:
Distort:
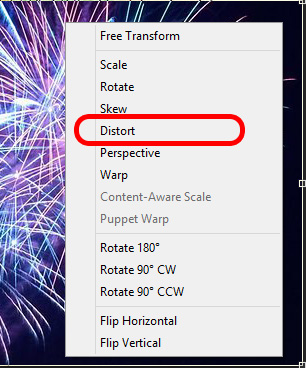
The Distort tool allows for complete distortion using the eight points around the edge. Play around with the controls and see what is possible. This is what I managed to do:
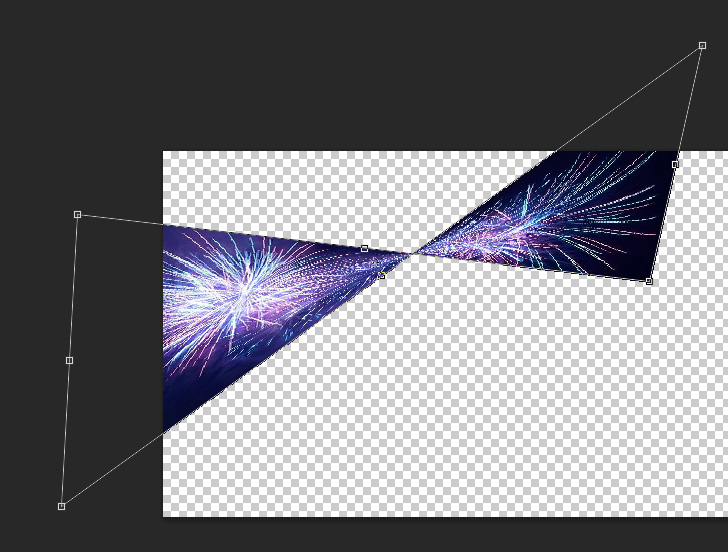
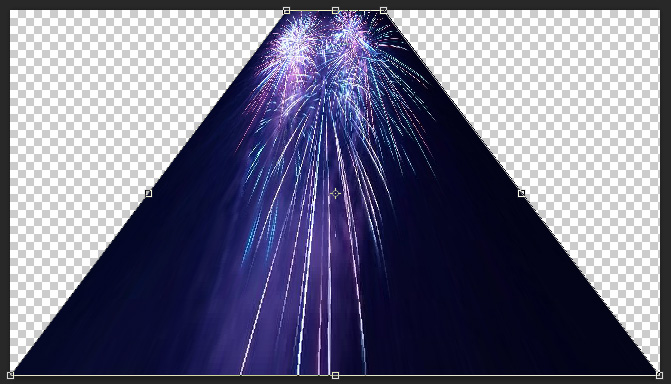
Perspective:
Play around with the perspective of your image. This is another distortion function. If you move a corner control along either it's vertical or horizontal axis, its counterpart control on that axis will move towards it. You can only move each of the middle controls along the axis of the line they sit on.
Warp is the most fun option, but also the most complicated to get right.
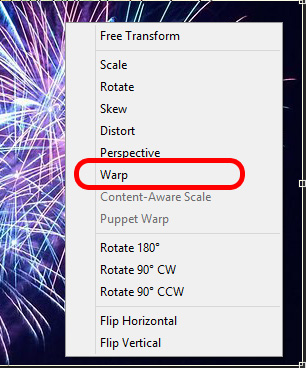
By choosing the Warp option you add several new controls to the image. Now you can click anywhere on the image to warp not only it's shape but how the image is stretched and distorted within the confines of the canvas. See the example below:
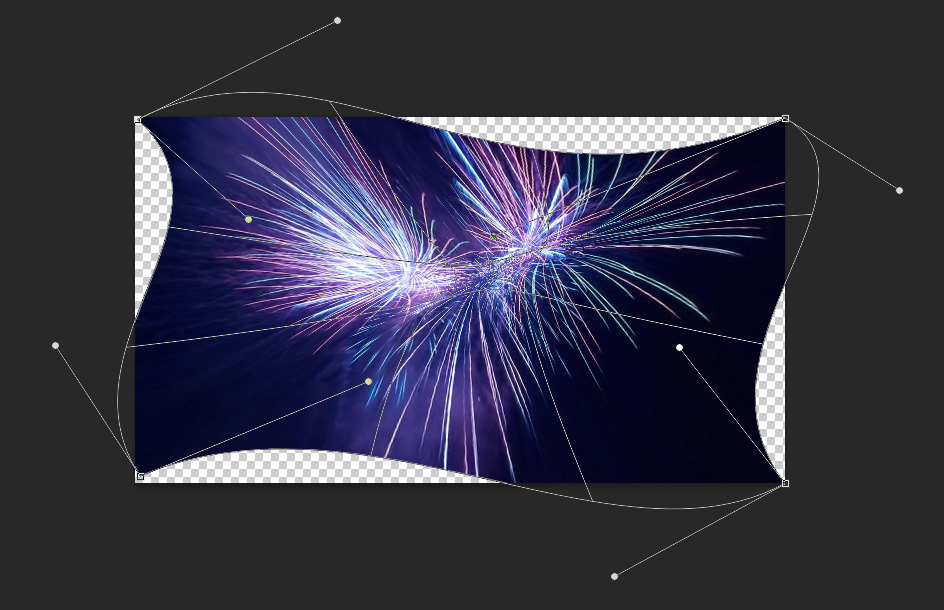
You can see the controls on the end of the protruding lines, these allow you to add curvature to the outline of the shape, but also using anywhere inside the grid within the image you can almost crate a crease or fold like it's a piece of cloth or a flag. I most often use this function to fit an image or logo to another item or fitted garment so that it looks like it belongs there. Like adding a slogan to a T-Shirt on a model. If you just paste the slogan on it looks like it hovers in front of the T-Shirt, but if you contour the image to fit the body shape and creases it looks real. Perfect for clothing CADs.
The remaining options are fairly self explanatory:
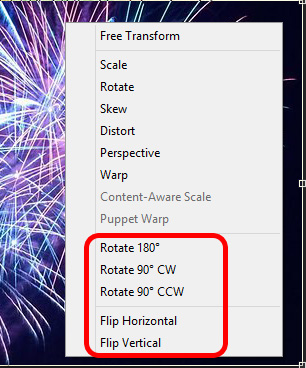
The Rotate 180º/90º CW/90º CCW allow an automated rotate clockwise or counter-clockwise to the specified angle.
The Flip options will mirror the image either horizontally or vertically.
That's the basics of the Move Tool.
Now move on to the Marquee Tool.