![]() When it comes to retouching and "healing" photos whether it is simply to remove the red-eye effect caused by camera flashes, or blemishes, then these five tools are very useful. The five tools are:
When it comes to retouching and "healing" photos whether it is simply to remove the red-eye effect caused by camera flashes, or blemishes, then these five tools are very useful. The five tools are:
- Spot Healing Brush Tool
- Healing Brush Tool
- Patch Tool
- Content-Aware Move Tool
- Red Eye Tool
In this tutorial we will just cover the basics, but all of these tools (except the Red Eye Tool) are aware of the content in the image and do their best to fit your healing touches in with the rest of the image.
The chosen photo for all of these tools is a common red-eye image, but also has some skin blemishes which will allow us to show what all of the tools can do. At the end of the tutorial there will be a video showing the use of all of the tools.
Red Eye Tool
We'll start with the most commonly used tool, the red eye removal tool. As the name of this tool suggests it is for removing the red eye effect you get in some photos when the flash of a camera lights up the back of the eye in a red colour. This tool is very simple to use. The tool changes the red pupil to black and just converts it from one colour to the other, doing its best to only change the red and avoid any light effects.
To use the tool simply click on it from the list, and then click on the red of the pupil(s) as required and it will change them automatically for you. In the GIF file below you can see the eyes flash from red to black to see how well the tool worked.

Spot Healing Brush Tool
This is the first of the tools we can use to get rid of blemishes, or to heal this photo as required.
Using our newly red-eye removed version of the photo as below, we are going to remove the mole/blemish under the eye on the left hand side of the image:
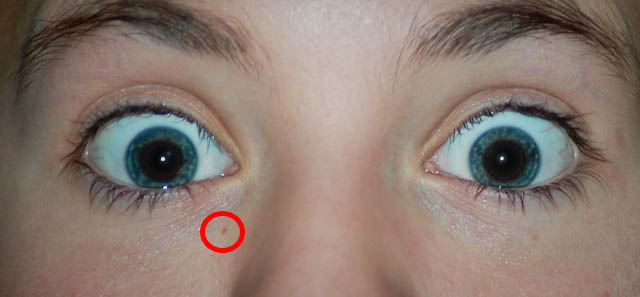
This tool is very simple to use. After selecting the tool, just use it like a paint brush to paint over the blemish. Photoshop will then judge how the image should look by using the pixels and content around the area you've 'painted'.
Healing Brush Tool
The Healing Brush Tool works in much the same way as the clone stamp tool. Basically you select a target area in your image that you want to use as a source to cover up another part of your image. It will then copy from that target point you've selected. Then as you paint over the blemish from left to right, it will copy from the target source in the same direction, so make sure you have enough space in your target source, because if for example your target source is the right hand side of the bridge of the nose and you are looking to cover up a section of skin two cm long, painting left to right will include shadow and some of the eye.
The difference between this tool and the clone stamp tool though is that as this one is content-aware it will use the surrounding image to try and fit it into your area.
For this tool we will be covering up these two blemishes:
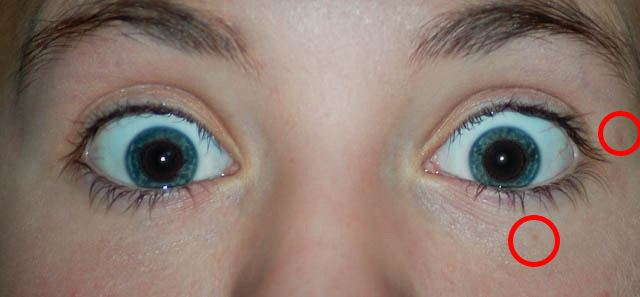
As both of these are just small round areas, I just need a clear skin area, so I am choosing the area between the eyebrows. To select your target source area (which you must do before you can retouch), press the Alt key on your keyboard and then click on your target source. Now Photoshop will use that area until such time as you change it. Now using a paintbrush size of around 20 pixels in this case, just click on the two blemishes and see them vanish.

Patch Tool
The Patch Tool works much the same as the Spot Healing Brush Tool, except that you get to select the area you wish to replace. Just make sure once again that your target source area has enough clear space for your requirements.
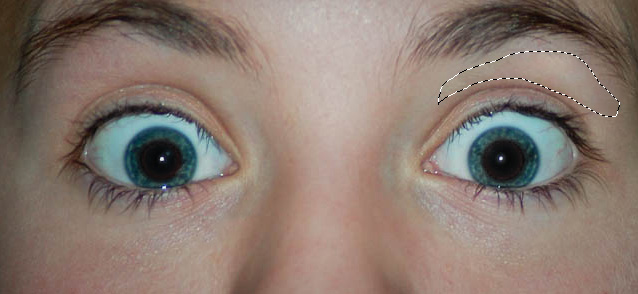
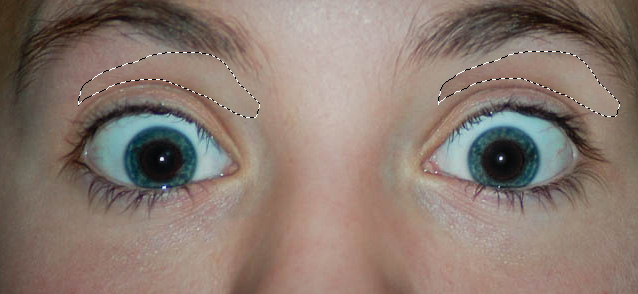
We will now clear up the veins under the right-hand side eyebrow. With the tool draw your selection:
Now click and hold within your selection and drag it across to a clear skin area. I have chosen the opposite side of the face:
As you move your selection you will see that the area you are hovering over appears in your original selection area allowing you to see how clear your source will be. As you can see in the image above both selections now appear the same, but once you release your mouse click, Photoshop will use its content-aware function to make your source selection fit in with the original image. See the GIF image below to see the original and retouched photos:

Content-Aware Move Tool
New in CS6 comes the Content-Aware Move Tool. In previous tutorials you have seen how the Move Tool works being able to move images and selections around as required, but with this tool, once you move your selection(s), using the content-aware system it removes your original selection moves it as required, fills in where the selection was before, and makes your moved selection fit in with the image too.
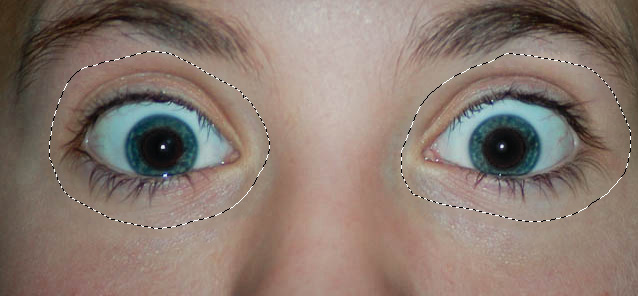
For instance let's say we wanted to move the eyes up a bit so that there was less space between them and the eyebrows. Firstly using this tool we would draw our first selection around one of the eyes. To draw multiple selections, just hold down the Shift key on your keyboard while drawing the other selections. We do this to draw round the other eye too:

Now click and hold within any of the selections and drag them to where you want them to go. In this case we drag them up a bit:
Once we release our click Photoshop makes our new position fit. See the GIF below for before and after:
There you go, all five healing tools. And see below a GIF showing the difference between the fist and last images:
Finally, this video shows the process from the first image to the last:
That's the common uses of the Healing Tools.