Whenever I see tutorials on the basics of using Photoshop they always assume that you already know certain things, so for once I wanted to go right back to the very basics. I know when I first started using Photoshop and doing graphic design, I had to search multiple different websites just to understand what and where everything was. Even before you understand how to manipulate images, play with masks or create your own art, perhaps it would be useful to understand the tools at your disposal, but first understanding your layout is paramount.
My tutorials will be using Photoshop CS6 on a PC, so should be relevant to other more recent and future versions of this software.
Layout Working Style
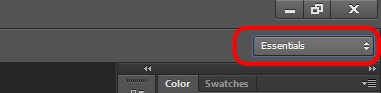
I choose to work in the Essentials layout, but you can
customise your own preferred layout or choose one from the drop down list. The drop down box can be found at the top
right of your screen.
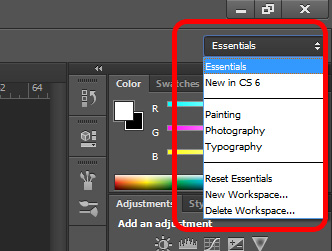
If none of the preset layouts work for you, you can
customise by clicking on "Window" on the top menu and selecting which
windows/tools/boxes you want visible in your work layout. As you select and deselect them you will see
them appear in either of the two sidebar sections as below. To reorder them, just drag the boxes up and
down as required.
Play around with these settings until you find the one most suited to your work style.
Tools
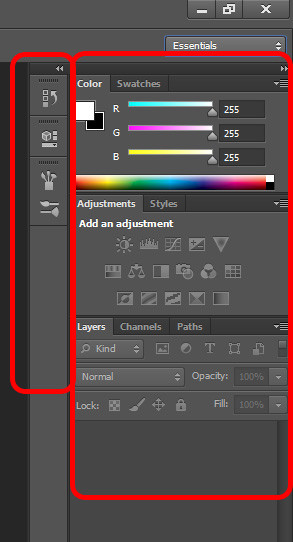
![]() You generally find the tool selection bar on the left
hand side of the screen. In the past it
has been comprised of two rows, these days it is more commonly just one, and
looks like this.
You generally find the tool selection bar on the left
hand side of the screen. In the past it
has been comprised of two rows, these days it is more commonly just one, and
looks like this.
So what are the tools? See the ones that have a small diagonal triangle/arrow pointing down and right? These ones have other related tools in a sub-menu. To access them just press and hold on the visible one to show them. The bracketed letter is the shortcut key on your keyboard to access the tool. Press it multiple times to cycle the available tools in the sub-menus.
From the top down they are listed as:
- Move Tool (V)
- Rectangular Marquee Tool (M)
- Elliptical Marquee Tool (M)
- Single Row Marquee Tool
- Single Column Marquee Tool
- Lasso Tool (L)
- Quick Selection Tool (W)
- Crop Tool (C)
- Eyedropper Tool (I)
- Spot Healing Brush Tool (J)
- Brush Tool (B) - In progress
- Clone Stamp Tool (S) - In progress
- History Brush Tool (Y) - In progress
- Eraser Tool (E) - In progress
- Gradient Tool (G) - In progress
- Blur Tool - In progress
- Dodge Tool (O) - In progress
- Pen Tool (P) - In progress
- Horizontal Type Tool (T) - In progress
- Path Selection Tool (A) - In progress
- Rectangle Tool (U) - In progress
- Hand Tool (H) - In progress
- Zoom Tool (Z) - In progress
Beneath the Zoom Tool you have two icons. The left one allows you to return your
foreground and background colours to their default settings (D). The right one allows you to switch background
and foreground colours (X).
The white and black overlapping squares beneath these two are your foreground colour (in this case white) and background colour (in this case black). You can change the colours just by clicking the relevant square and choosing another colour.
- Edit in Quick Mask Mode (Q) - In progress
- Standard Screen Mode (F) - In progress
The tutorial for each group of tools can be seen by clicking on the link for the first tool in the list above.